Overview
The Risk module in Formalize provides a structured workflow for identifying, assessing, and managing risks. By combining configurable risk types, approval flows, mitigation fields, and custom fields, the module ensures flexibility while supporting consistent risk governance across the organization.
Risk Settings
Risk settings allow you to fully tailor how risks are categorized, scored, approved, and documented.
To access these settings, go to:
- Settings → Risks
There you will find the following configuration areas:
- Risk types including consequence, probability and total risk score calculations
- Approval settings
- Mitigation fields
- Custom fields
- Folders
- Connections
- Data retention settings
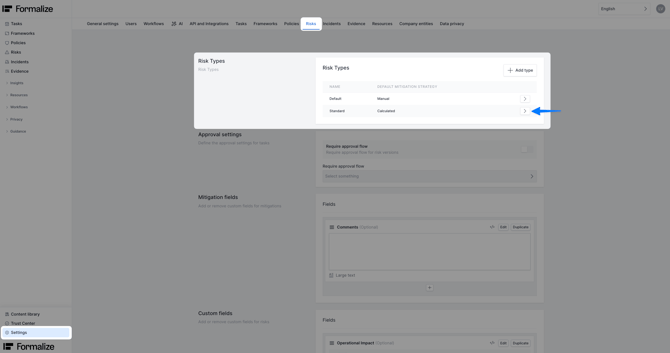
Risk Types
Risk types allow you to differentiate between categories of risks, such as operational, legal, information security, or financial risks. Each risk type can use its own calculation method, scoring model, and value ranges for consequence, probability, and overall risk score. As a result, every risk type generates its own tailored risk matrix.
Creating Risk Types
- Navigate to Settings → Risks → Risk Types.
- Click + Add Type.
- Enter the name of the new risk type choose a mitigation type (learn more about calculated and manual mitigation in linked articles) and save.
Risk types appear as tabs in the main Risk module, allowing you to switch between types easily.
Editing Risk Type Settings
Selecting a risk type opens a configuration panel where you can configure consequence, probability and total risk score. The levels of consequence and probability create the overall risk matrix. The matrix can range from 3x3 to 7x7.
Consequences-
- Rename consequence levels
- Add a description
- Assign a color
- Set a numeric value used to calculate severity
- Add new consequence options by clicking '+Add option'
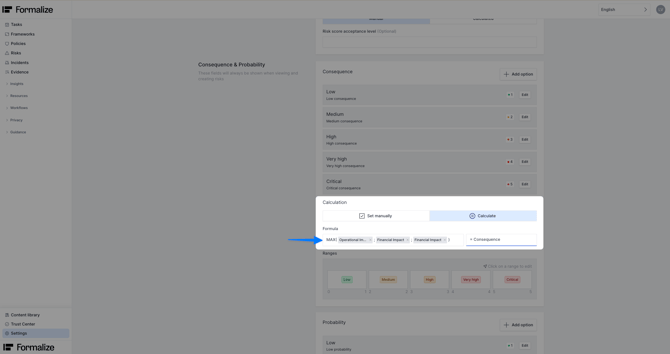
- You can also fine-tune the scoring model using custom fields if needed. To do this, switch the calculation method to Calculate and select the predefined custom fields that should be used to compute the score. Find more details down below inside Custom field section.
Probability
- The same editing options apply as with consequences.
- The same editing options apply as with consequences.
- Define whether the score is calculated as:
- Sum of probability + consequence
- Product of probability × consequence
- Change ranges by clicking on one and adjusting the range itself.
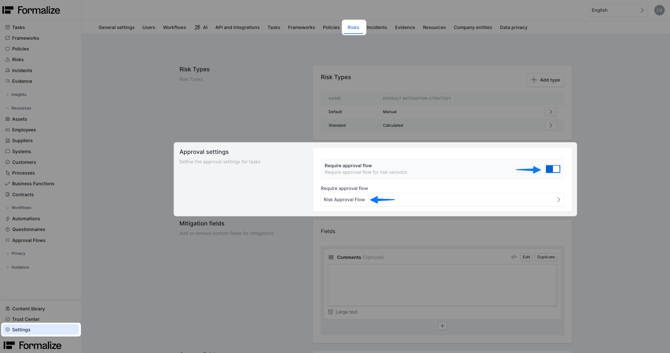
Approval Settings
There is an option to activate an approval flow for new risks. By toggling the checkbox, approval flows are activated for risks in general. After, you can choose the required approval flow from the list prior defined approval flows. Once activated, the risks must be approved by an authorized person.
Within each risk item, you can submit the respective risk by clicking on the Request Assessment field.
Before the request is sent, a warning appears stating that this version of the risk can no longer be edited once an approval flow has been initiated. Edit mode is currently closed for this risk.
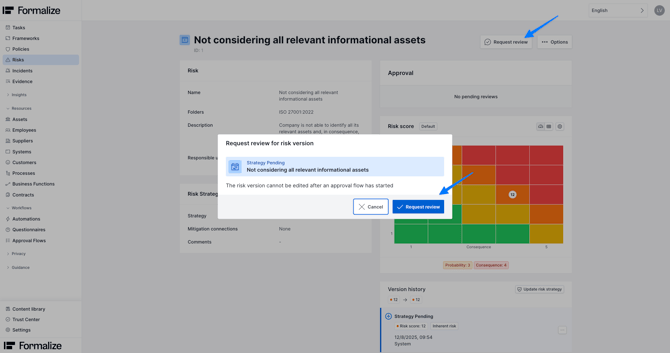
After requesting an assessment, you can track the approval status inside the risk itself. Once approved, the risk version is finalized. If rejected, the risk can be revised and resubmitted.
Learn more about Approval Flows and how to set these up.
Mitigation Fields
Mitigation fields expand the Risk Strategy section of each risk. Use them to capture additional strategy-related information beyond the default comments field.
View our article about Custom fields to learn how to create additional fields.
These newly created fields will then appear inside each risk under Risk Strategy, where users can update them during strategy creation or revision.
Custom Fields
Custom fields allow you to add additional information fields to the Risk overview itself. Further, fields created here can be used to calculate consequence and probability inside Risk Types.
In the following example three impacts are created as custom field, single select, including numeric values:
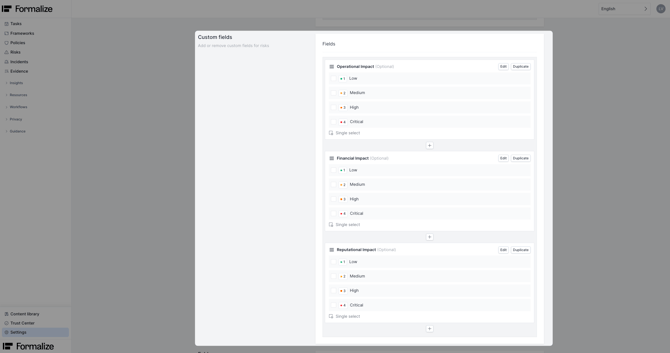
View article about Custom fields to learn how to create additional fields.
After these fields can be used to calculated the overall consequence score for the risk type:
Additional Settings
Folders
Folders help organize risks into categories such as:
- Departments
- Business units
- Compliance domains
Managing Risk Folders
- Navigate to Settings → Risks → Folders.
- Create or rename folders as needed.
- Assign a risk to a folder while editing it—or create a folder directly from the edit screen.
Folders appear as filters in the Risk list and help keep large risk inventories organized.
Connections
Create connections from risks to other modules to link items with each other. Learn more here.
Data Retention settings
Define a risk specific retention period. Learn more about archiving here.
Common Questions
- Can the naming of 'Consequence' and 'Probability' be changed?
No. The naming of 'Consequence' and 'Probability' cannot be changed. - What is the maximum size of the risk matrix?
The risk matrix can range from 3×3 up to 7×7. It is configured within Risk Types by adjusting and modifying the levels of Consequence (x-axis) and Probability (y-axis).
by Lea Vietze, Solutions Engineering Team Lead
We hope this article was helpful in gaining more understanding of Manual Risk mitigation!For any additional support, you are welcome to reach out with any questions by email, at support@formalize.com.
