Overview
The Tasks section in Formalize allows you to create, organize, and manage tasks across your organization. It helps ensure accountability by assigning responsibilities, supports prioritization, and enables tracking of task progress. You can also configure workflows like approvals and completion steps to align with your internal processes.
Configure your Task settings
In order to configure your Task settings, go to Settings → Tasks.
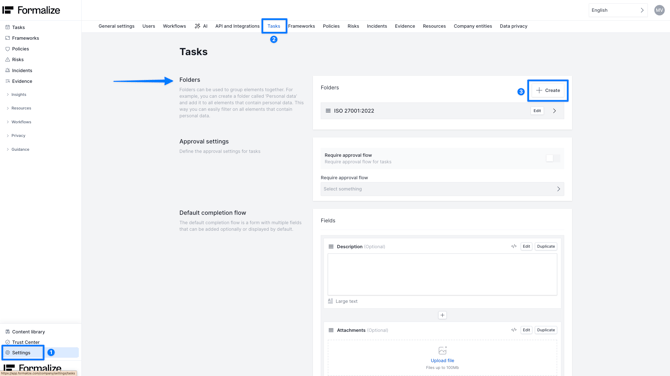
How to create folders
It might be a good idea to create folders to keep your tasks organised. In order to do this, go to Settings Tasks → Folders, and click on Create as shown in the image below.
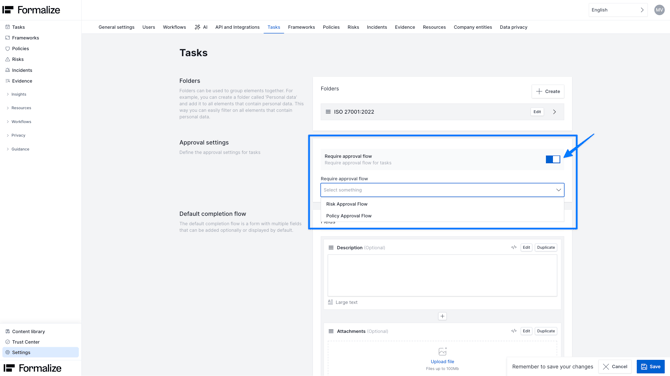
How to enable approval flows
Approval flows allow you to set up a process where, once the user responsible for a task marks it as complete, a notification is automatically sent to the reviewer. This ensures the person in charge can confirm that the task has been completed correctly before it is marked as so inside of Formalize.
You can enable approval flows from Settings → Tasks → Require approval flow.
Once activated, simply choose which approval flow you’d like to apply.
For more info on approval flows, you can check our Approval Flow guide.
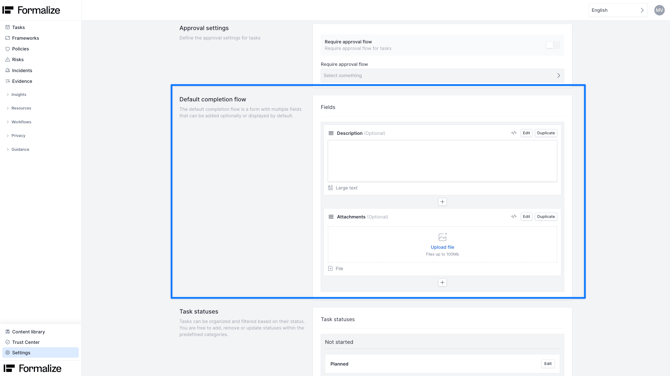
How to customize your task completion flow
In Default completion flow you can define the steps required to close a task. This may include filling in specific fields, adding attachments, selecting a timestamp, or any other required information. These fields are fully customisable and follow the same setup process as custom fields. For guidance, see our Custom fields article.
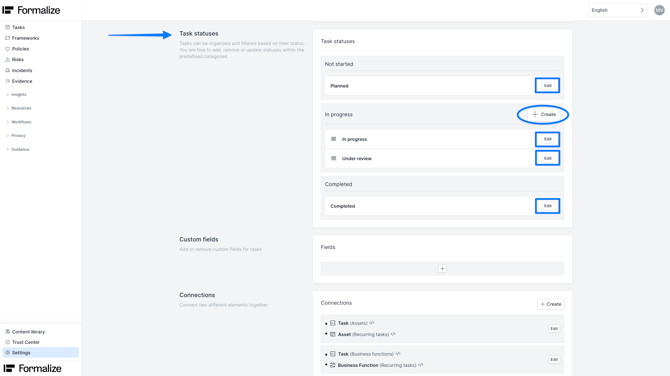
How to customise task statuses
By default, tasks include four statuses:
- Not started
- Two In progress statuses (In progress and Under review)
- Completed.
You can modify any of these by clicking Edit, entering a new name, and selecting Save.
You can also create additional statuses by clicking Create within the corresponding category and entering a name for the new status.
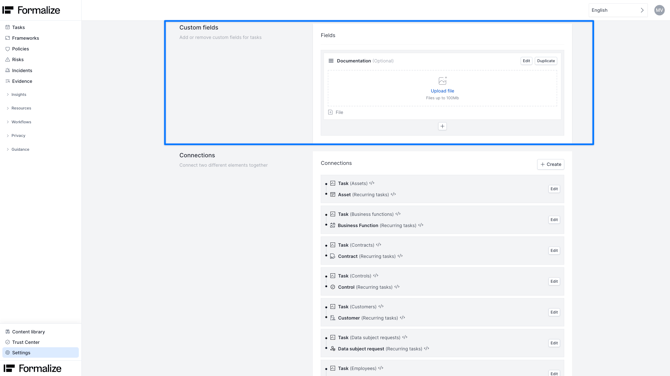
How to personalise custom fields
Custom fields allow you to capture any additional information you need for a task—such as extra details, documentation, or other relevant data. These fields will appear within each task in the Tasks module.
To learn more about how they work, check our Custom Fields article.
How to create custom connections
You can also create custom connections between tasks and other elements in the platform. See our Connections article for more info.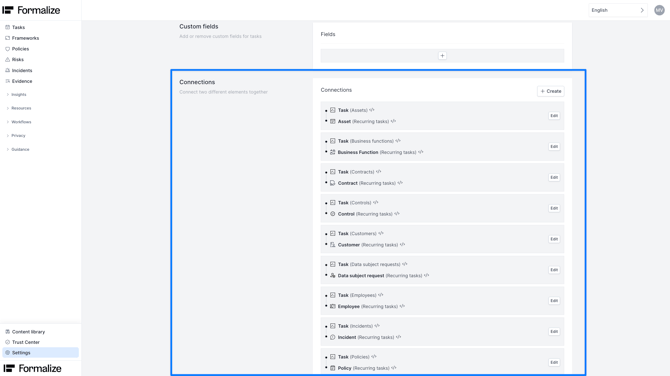
Data retention settings
You can also choose how long archived tasks remain in the Archive before they are permanently deleted. For more information about the Archive feature, please refer to this article.
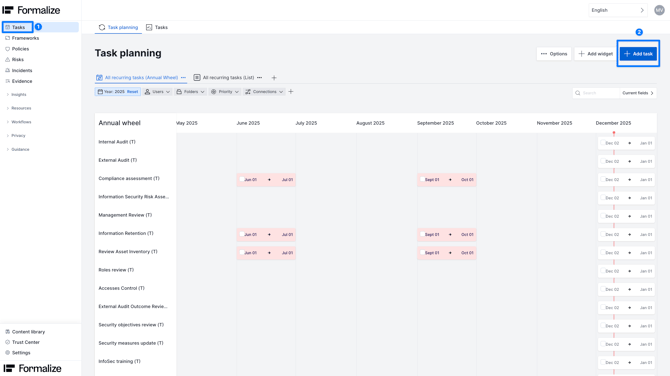
Create tasks
How to create a task
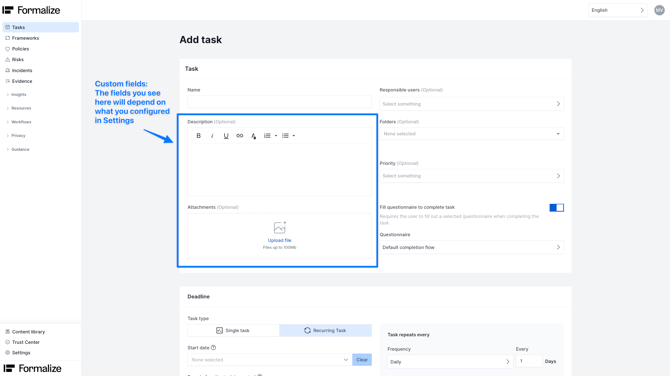
To create a new task, go to the Tasks module on the left-hand menu and click Add new task in the top-right corner.
On the Add task screen, you will be able to give your task a name assign one or more responsible users, place the task into a folder, and set its priority.
You will also see any custom fields you may have configured from Settings. For more info on how to do this, see the section above: "Configure your Tasks settings".
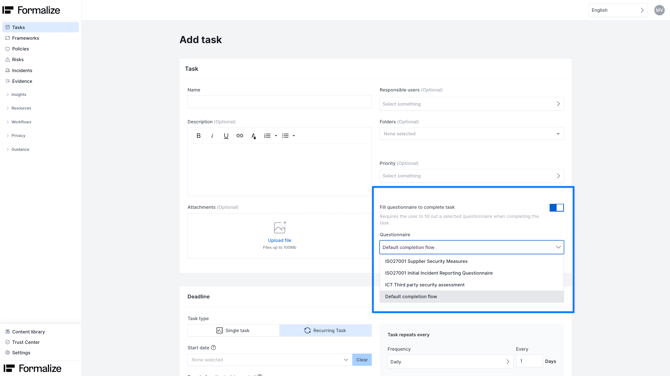
Adding a questionnaire to the completion flow
If you enable Fill questionnaire to complete task, the task can only be marked as complete once specific information has been filled in. This means users cannot simply mark the task as completed - they must provide the required information.
After enabling this option, choose which questionnaire should serve as the completion flow. You can select the default completion flow you created in the Tasks settings (see the section "Configure your Task settings") or any questionnaire you’ve created in the Questionnaire module. For more details, see our Questionnaire article.
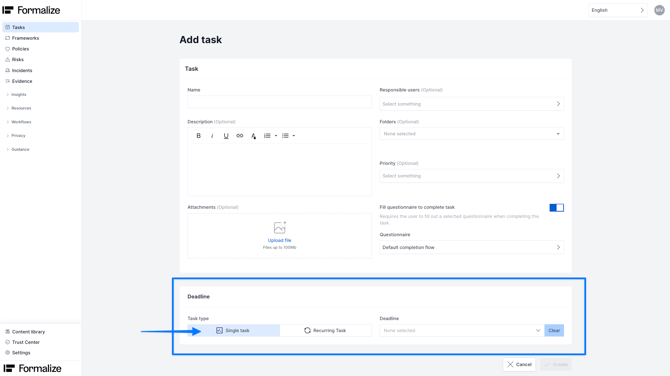
How to establish task type and frequency
At the bottom of the form, choose the task type based on its frequency:
-
Single task: A task to be completed once. You can set a deadline, and once the task is created, the responsible user will receive a notification with the due date.
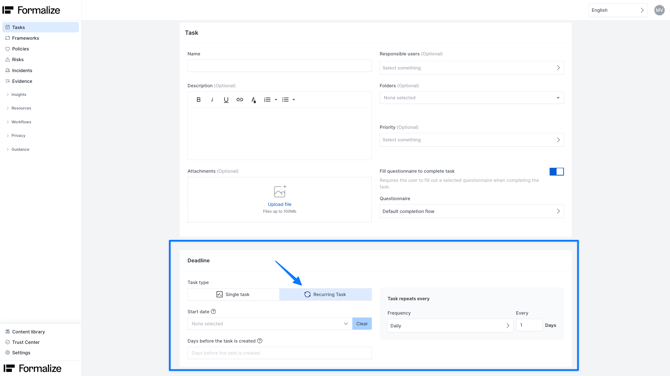
-
Recurring task: A task that is repeated at a defined interval. You can set the start date, how many days before creation the responsible user should be notified, and how often the task should recur.
Once all details are complete, click Create.
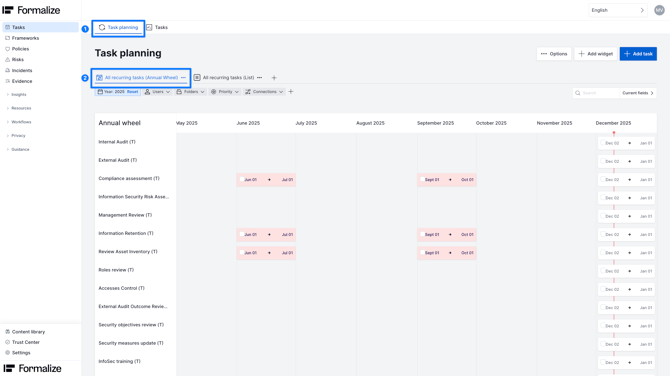
Your new task will appear in different views depending on the task type:
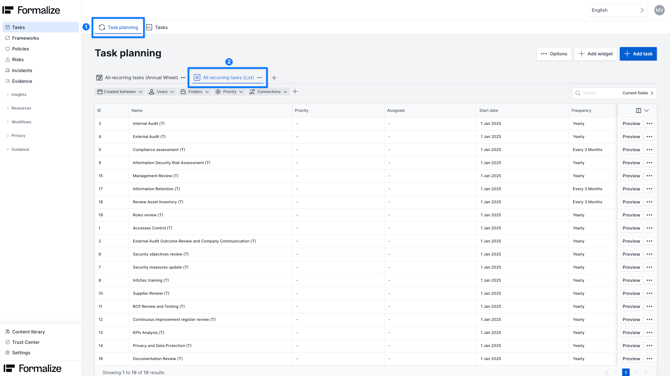
- Recurring tasks will appear in All Recurring Tasks (Annual Wheel) and All Recurring Tasks (List).
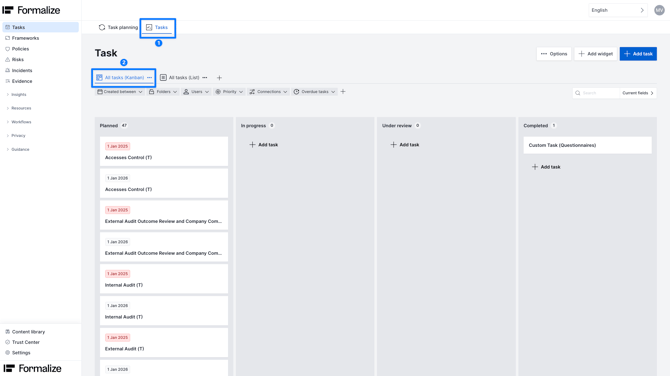
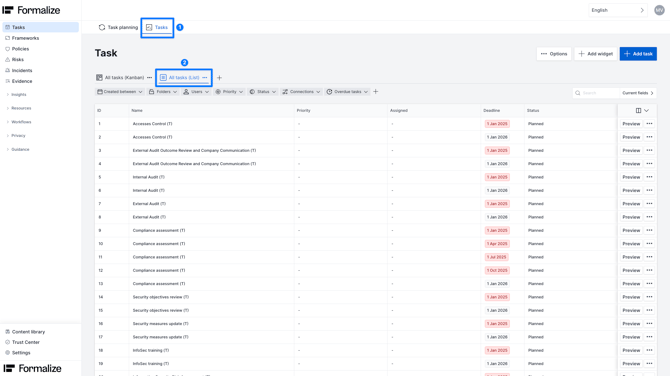
- Single tasks will appear in All Tasks (Kanban) and All Tasks (List) if it’s a single task.
Completion flow for tasks
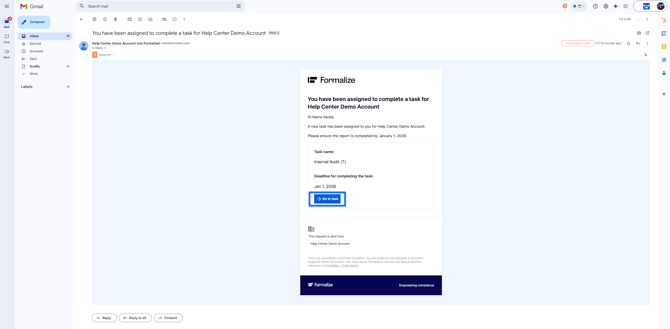
Notification to responsible users
As mentioned earlier, the responsible user(s) will receive an email notification when a task requires their attention. From that email, they can click the
Go to task button to be taken directly to the task in Formalize.
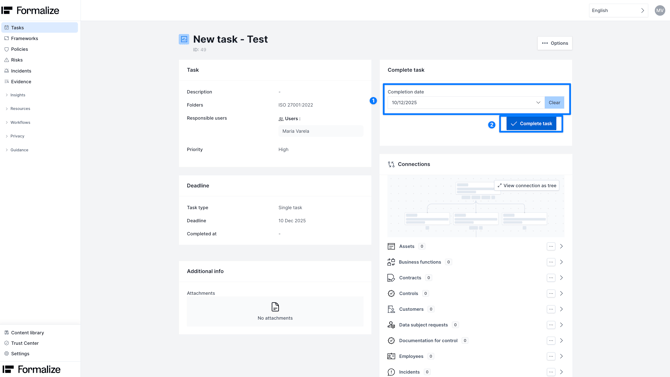
How to complete a task
Once you’re in Formalize, you’ll be able to see all the information provided by the task creator.
If the task doesn't have a completion flow, simply enter the completion date in the Complete task section (by default, it will show the current date) and click Complete task.
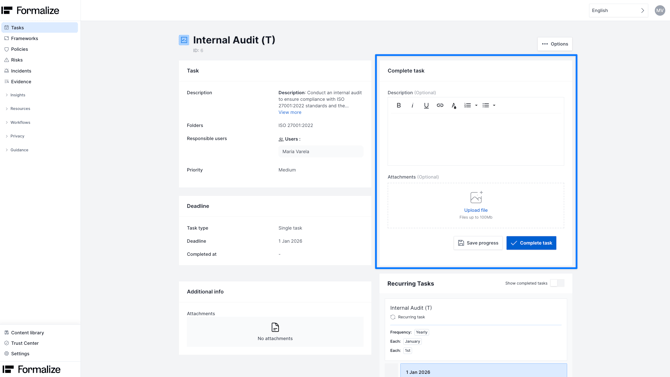
If, on the other hand, the task does have a completion flow, you will find more fields to fill in in the Complete task area. For more information on how to assign a completion flow, you can review the section "Complete tasks".
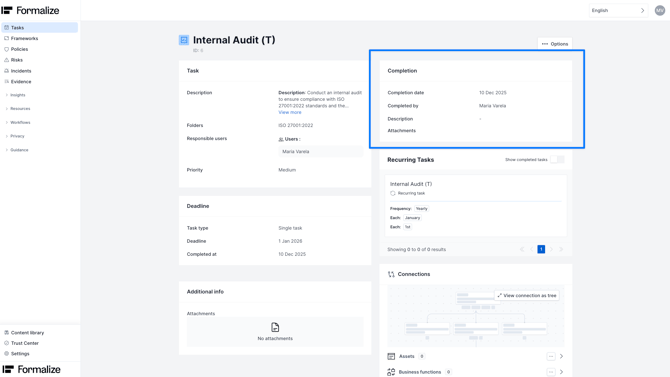
Once the task is completed, you can view all related completion details in the Completion section.
by María Amparo Soriano Varela, Customer Enablement ManagerWe hope this article was helpful and that you can now create Tasks in Formalize!
If you need additional support, you are welcome to reach out with any questions by email, at support@formalize.com.