Overview
The Questionnaires module offers a flexible way to create and manage questionnaires for a variety of purposes. You can use default templates covering topics from Business Impact Analysis to supplier data collection, or create a custom questionnaire to fit your needs.
Regular use of questionnaires helps establish an efficient and reliable structure for data collection and processing, supporting your compliance requirements.
Where to find Questionnaires
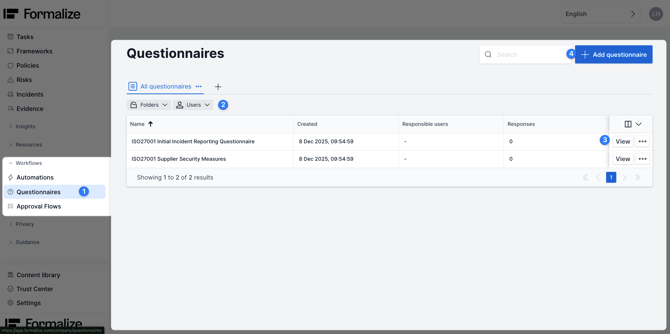
- Questionnaires can be found in the sidebar on the left hand side, under Workflows.
- Here, you will find an overview of all questionnaires in your account. Search for specific questionnaires directly in the search bar or can filter for folders and users, to narrow down.
- To view an existing questionnaire, click on the name directly or click View.
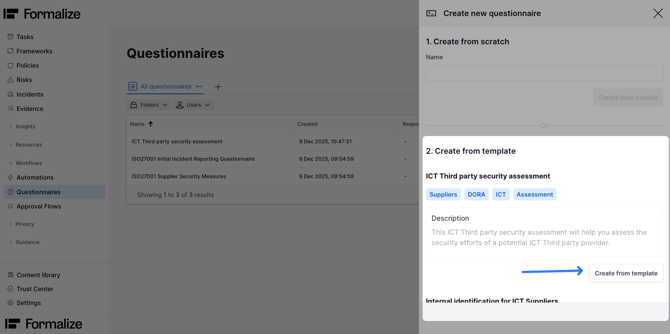
- To create a new questionnaire, click on Add questionnaire in the upper right corner. Here you can select a questionnaire from our templates or create one from scratch.
Setting up a Questionnaire
-
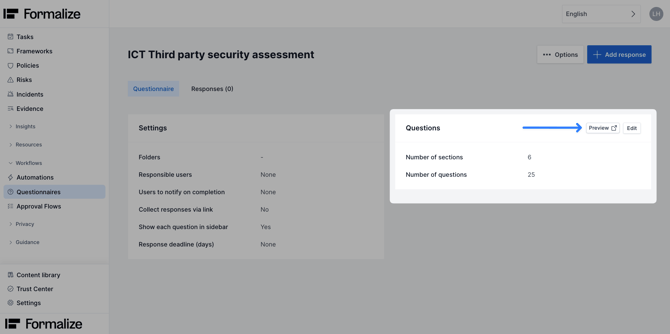
Questionnaire Overview
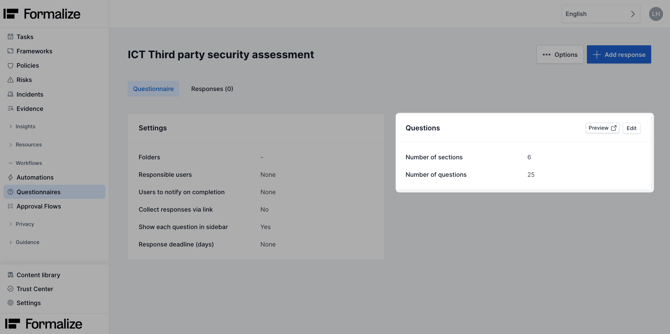
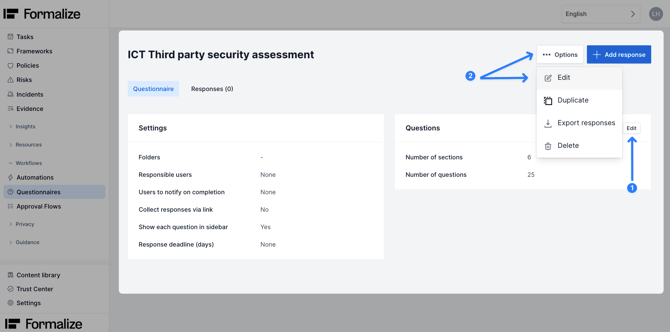
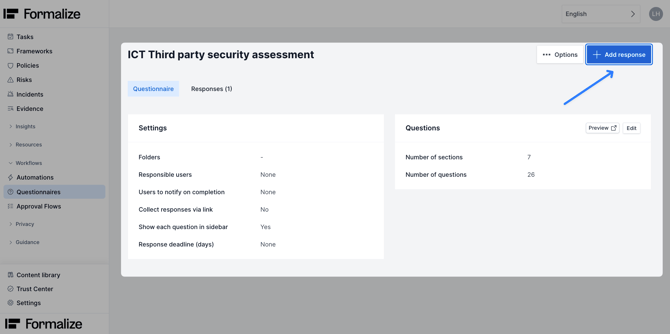
When viewing a questionnaire you will see: settings, number of sections and questions as well as response options.
At the top you can find Options, from which you can Edit, Duplicate this questionnaire, Export responses or Delete. You can also add a new response and see all responses already submitted. We'll cover this later in the article.
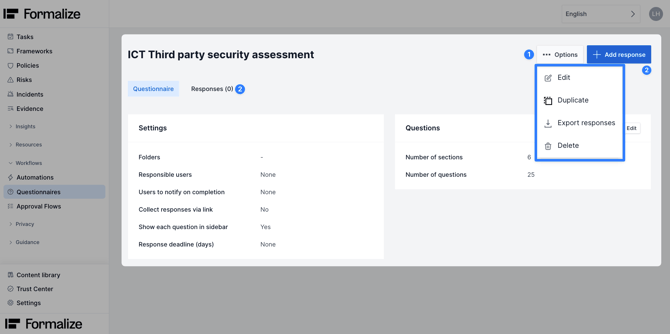
The Questions box shows how many sections the questionnaire contains and the total number of questions. You can also Edit and Preview from here.
2. Preview and Edit Mode
To modify settings, questions, or sections, enter editor mode. You can do this by either clicking Edit directly in the question box, or by clicking Options → Edit.
To see how the current questionnaire looks like when answering, you can click on Preview.
This will open a new window. Here, you can see the progress made in answering the questions and the different sections with their questions (2**).
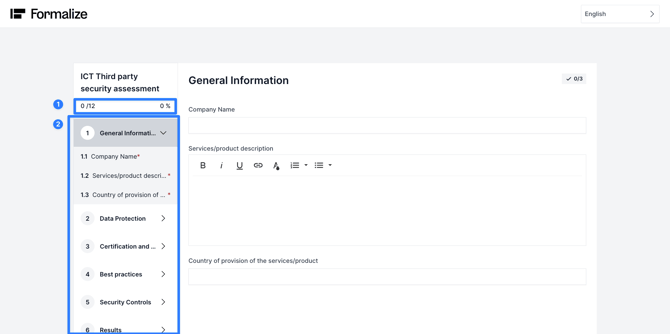
**(2) This is only visible if the settings say "Show each question in sidebar" is turned on "Yes".
3. Editing Settings
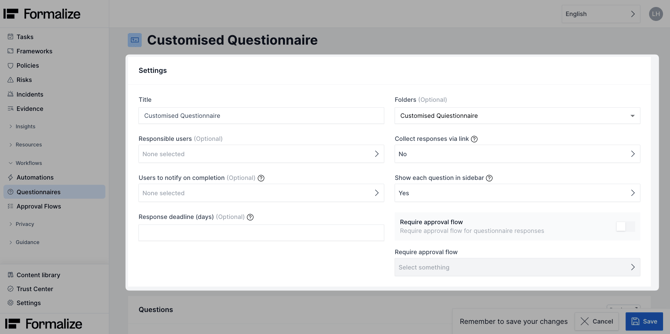
The Settings box contains basic information that lets you define the questionnaire’s purpose and control how respondents answer.
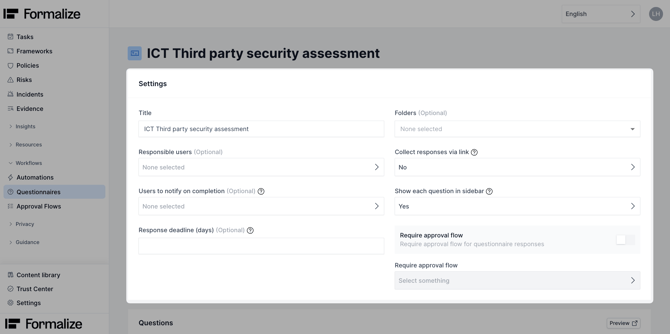
- Title: Name of the questionnaire
- Responsible users: The user(s) in Formalize that is/ are responsible for this questionnaire
- Users to notify on completion: The selected user(s) receive a notification when responses are completed
- Response deadline (days): This data point can be leveraged in automations to set automatic reminders
- Folders: To filter and sort
- Collect response via link: Settings for who can respond and authentication settings
- Show each question in sidebar: (Visible in Preview) If "yes" is selected, it shows the questions on the side while answering the questionnaire.
- Require approval flow: Approval flows can be configured to request approval on the response received. See more on our Approval flows article.
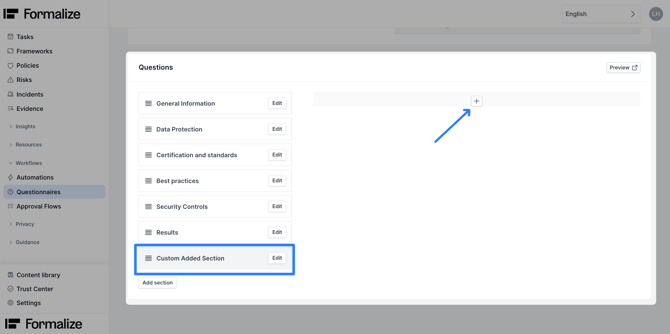
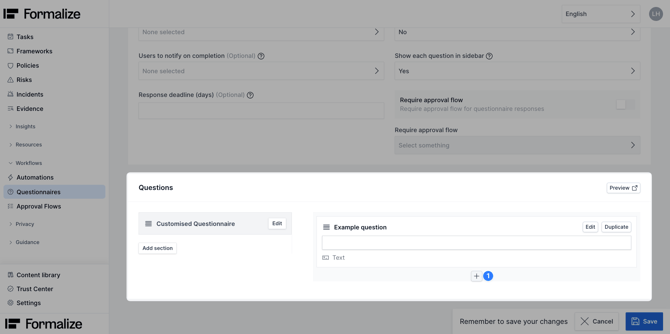
4. Editing Questions
Questions are organised into sections. Click on Add section to add a new one.

After naming the new section and saving, you will find a new empty section to the right. You can add a new question by clicking on the + icon.
For more information on Field Types and custom field settings check out our article on Custom Field creation.
Working with default Questionnaires
Formalize offers a selection of questionnaire templates that can be used directly or customized.
In the Questionnaire module, click Add questionnaire to see a range of templates. Select the one you want and click Create from template.
Creating a new Questionnaire
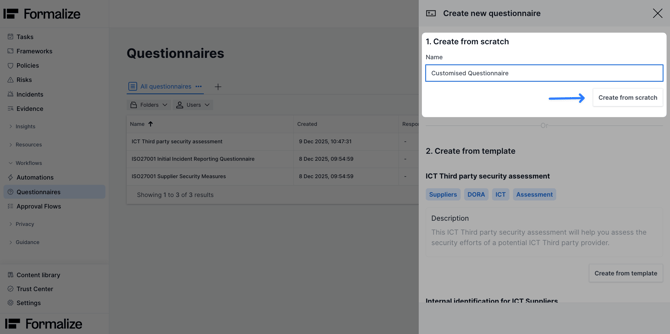
To create a custom Questionnaire start by clicking Add questionnaire, enter a name and click on Create from scratch.
Now you can define the questionnaire settings and add custom questions.
There is an example question which can be deleted or edited. Other questions need to be created by clicking on the + icon in the question field and choosing a type.

To save changes click Done and then Save in the lower right-hand corner.
Responses
View existing responses
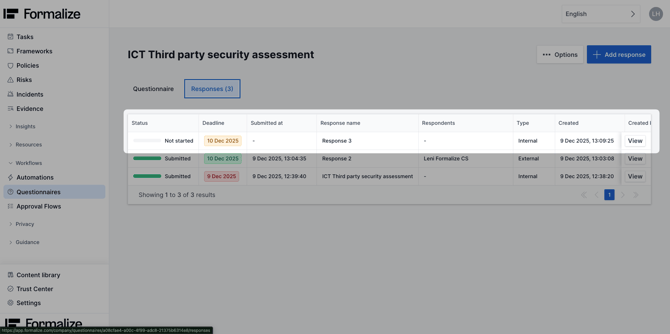
Responses can be viewed when entering the questionnaire overview and clicking on Responses(x). Here you can see every response to that questionnaire including the status of completion, deadline and submission date (and further insights).
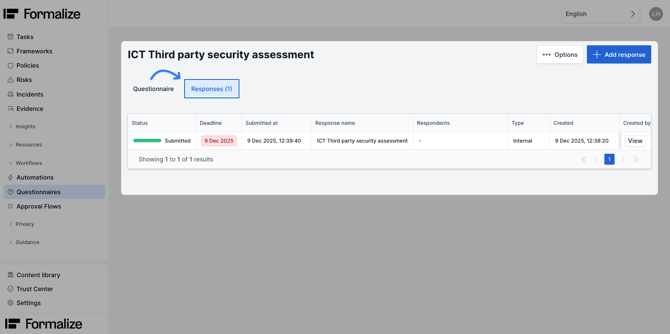
Click View to see individual response details.
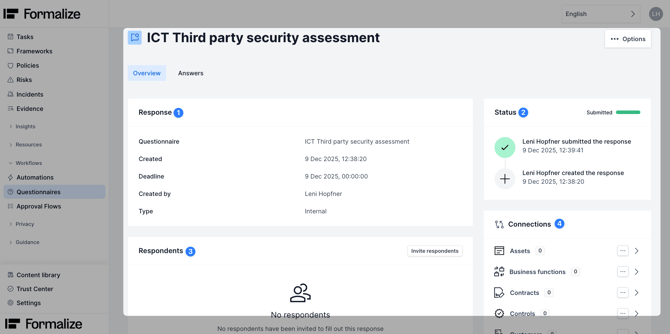
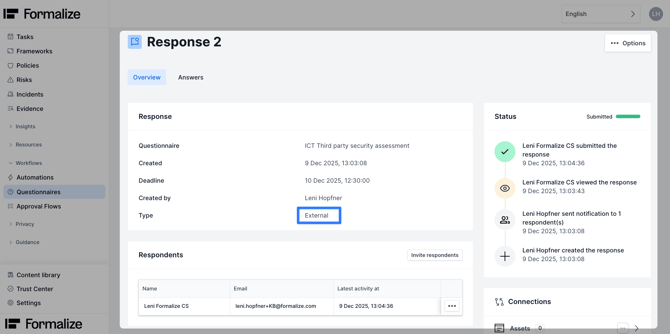
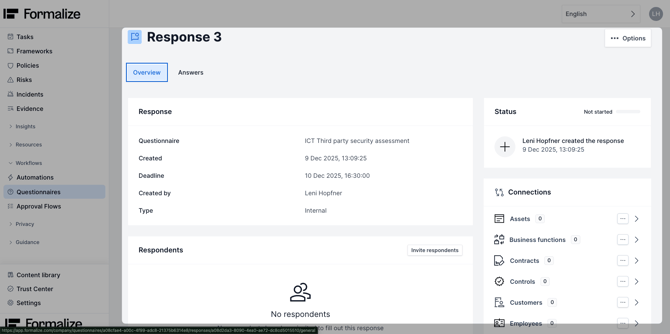
Each response overview contains:
- Response
Name of the questionnaire, creation of the response and deadline, respondent and type of response - Status
Timeline of changes and submission history - Respondents
Here respondents can be invited by e-mail or are already listed if previously invited - Connections
All data connections in Formalize are listed here. For insights on how to establish these see our Connections article.
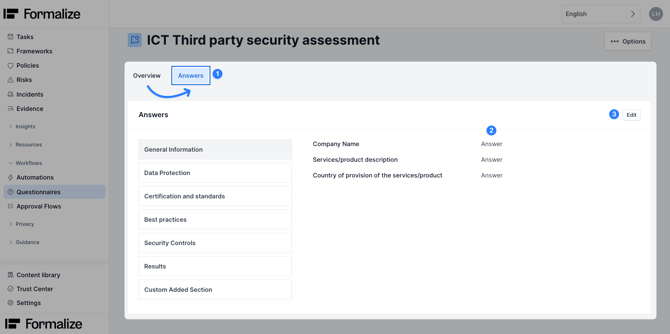
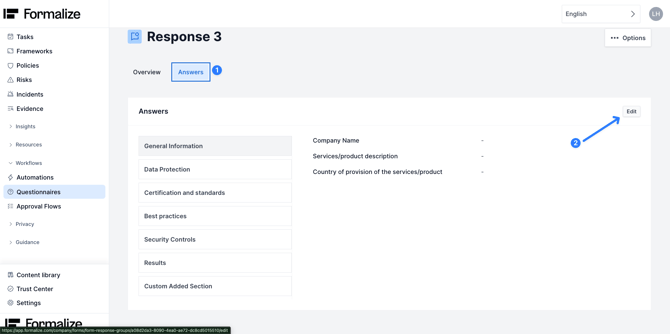
From Answers, you can see the answers that were given and edit them.
Add responses: Invite respondents (External)
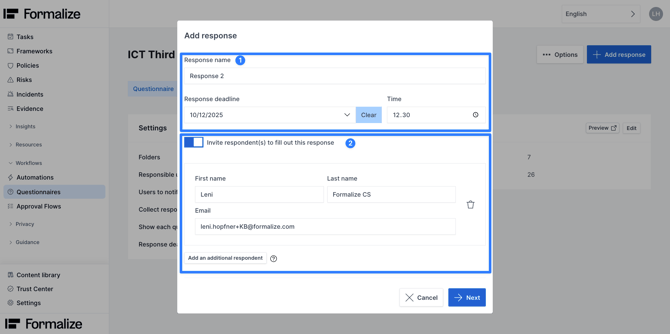
To invite respondents, click on Add response.
In the new window fill out the information on the respondent.
- Name the response and add details about the deadline
- Invite respondents by e-mail. They will receive an e-mail with a link to fill out the questionnaire. If a link was used to answer the question, the type of the response will be External.
Add responses: No invited respondents (Internal)
The quesionnaire can also be filled in by Formalize users, without a link being sent out. In this case the response is internal, and you can simply deselect the toggle Invite respondents.
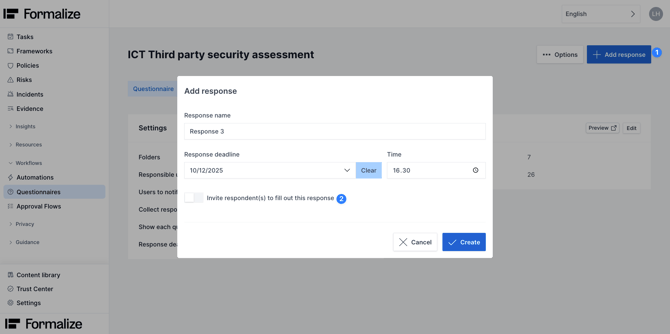
This response will be listed in the response overview.
Click View.
You can answer by going to Answers and then Edit. Here you can fill out the questionnaire and save the answers.
Add Questionnaires from Resources
You can add a questionnaire response from a Resources card, for example, from a Supplier. You click the supplier that you wish to connect to the questionnaire and click Options in the upper right corner. From the dropdown click Add questionnaire, select the relevant one and then click on Add response.
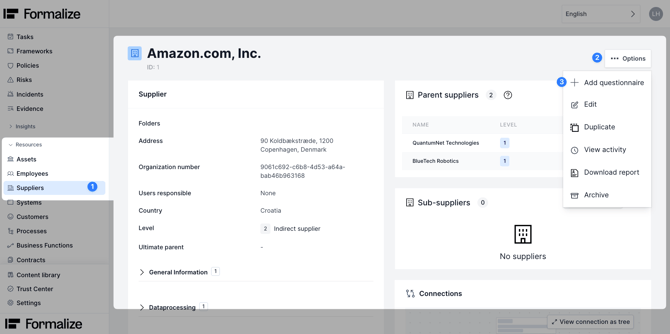
You can now create either an external or internal response.
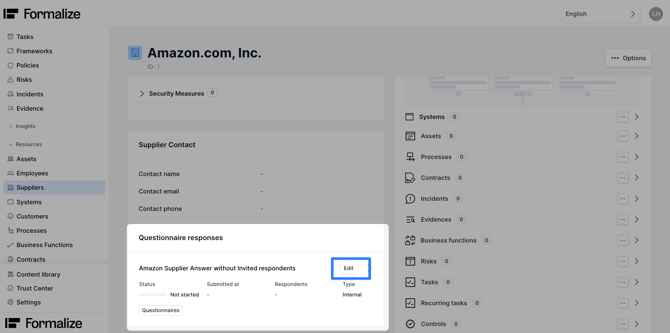
You will see the connected questionnaire in the Supplier card under Questionnaire responses and directly edit the answers when clicking on Edit.
Common Questions
- What happens to my responses when I delete a questionnaire?
If a questionnaire is deleted, the responses will be deleted as well. - What can I do if I accidentally sent the questionnaire to the wrong person?
You can create a new response and delete the wrongly sent one. - How do I send a reminder when people have not responded for long?
The invited respondent can be sent a reminder through the Response overview. Click on the three dots next to the name and then select Send reminder.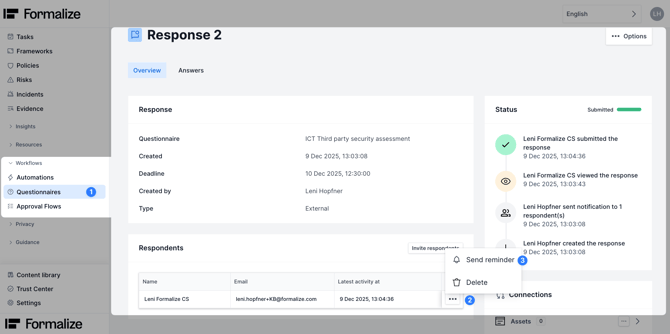

by Leni Höpfner, Customer Success Assistant
We hope this article was helpful and that you now have a clear understanding of how to use the Questionnaire module in Formalize!If you need additional support, you are welcome to reach out with any questions by email, at support@formalize.com.